
Doodle Coats
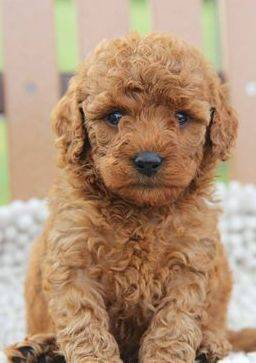
Above: Mini F1b, Curly.

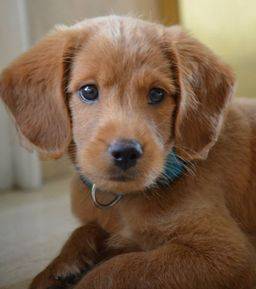
Above: Mini F1, Wavy.

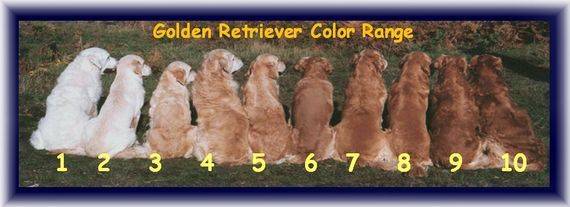
Coats can vary in color. A good way to predict adult color is to look at the ears of the puppy. In addition, consider the pedigree when expecting a litter. It is hard to understand the complexity of the gene pool when mating. From my experience, red is considered a dilute gene of black. When red is bred with white, black or brown, black is dominate and pups are black. Two red parents, will make red or apricot. However, to carry the true red gene is very rare. Red can often fade with maturity. Many breeders boast about having red as it is highly sought after, but it can and may fade with time. It is said that only 5 breeders truly carry the red gene/line. I make a good effort at trying to produce red, but it is more rare. Brown and black also produce black. Two browns will make brown. Red can be so dark red that it is considered mahogany or rust. My Sangria, F1 mini-goldendoodle female is an example of this beautiful color. I do not claim to be an expert in the study, nor do I make any guarantees on future adult color. In breeds like the cocker spaniel, the red will be apricot as a pup, but can become dark red with maturity. Spots can also widen with maturity or appear to have moved around as they broadened out. In designer breeds, the puppy can look completely different as an adult then how it did as a puppy. You may notice this at the very first haircut. As much as we love color, we need to pay more attention to the temperament of the puppy and make sure the puppy is very socialized and loved, especially during the critical stage of development up to 5 months. See my temperament testing pagefor more information on this.
Regarding coats in goldendoodles and the hypo-allergenic questions, please see this wonderful information here:
http://www.dogster.com/forums/groups/thread/453567
3 types of coats:
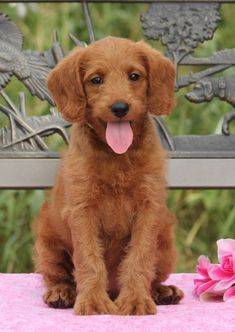
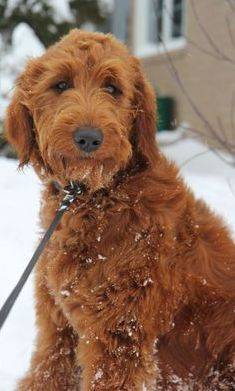
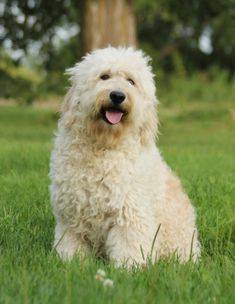
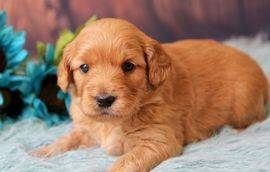
1.) Loose and wavy: This is the most common type of coat found in a goldendoodle such as an F1. They are considered low to non-shed. They are easy to maintain. You may want to brush in the common friction areas such as behind the ears, hind quarters, and underarms. Bodily brushing about once a week. A young puppy with a loose or wavy coat will not show any waves/crimping on the forehead.
2.) Straight: These coats are considered flat or sporty like the golden retriever. They are the easiest to maintain and need minimal brushing. They will not show any waves/crimping on the forehead as a puppy. They will have some shed.
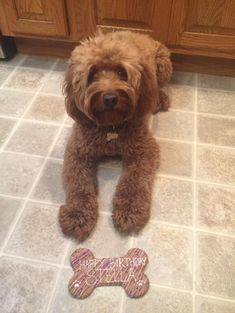
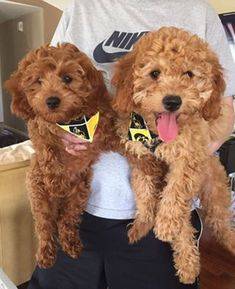
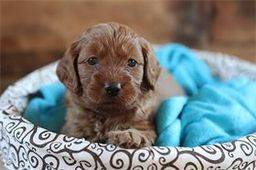
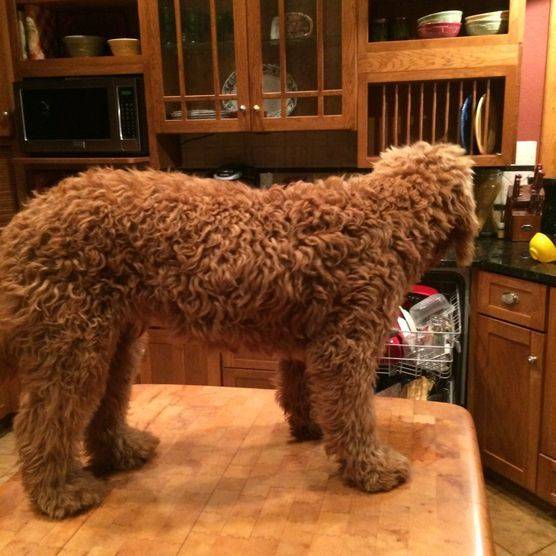
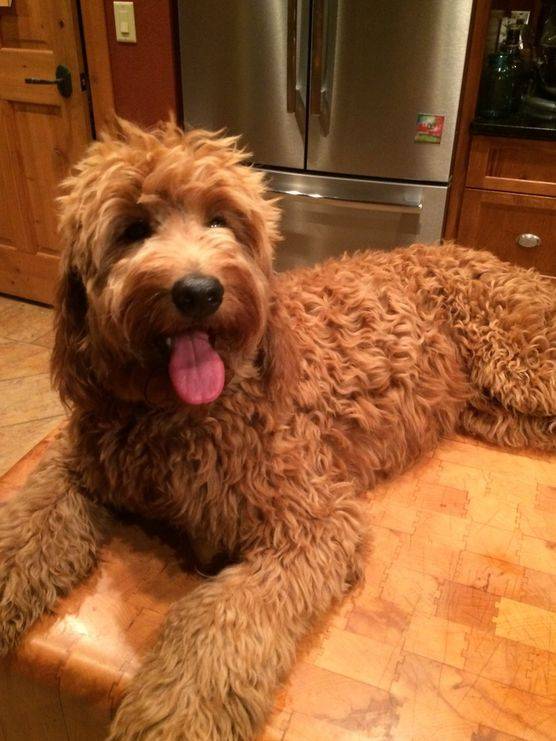
3.) Curly: These coats can be easily identified with the crimping on the forehead as a pup. They are most common in F1bs. Their coats can have "loose curl" or "tight curl." They require daily brushing and are considered non-shed and the best choice for allergy customers.
Examples:
Above: "Loose and wavy" as a puppy at 5 weeks old.
"Loose and wavy" at 5 months. This is an example of an F1. This cross is nice for customers that want more of the golden retriever temperament as the pups are 50% poodle and 50% golden retriever.
Left: "Curly" as a puppy. Puppy at 5 weeks old. F1b, crimping on forhead visible.
Right: "Straight" at 5 months. This coat type typically can be found in F1 litters. No crimping on forehead or ears.
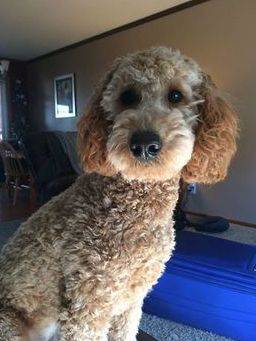
Left: tight curl as an adult. Right: "Curly" at 10 weeks old. More squiggles on forehead than "loose and wavy" type. Notice the difference. This is an example of an F1b. This coat type is best for those that have allergies and desire lots of curl . This cross is 2/3rds poodle and 1/3rd golden retriever.
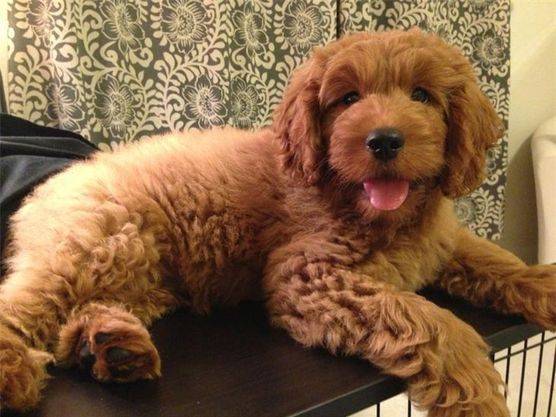
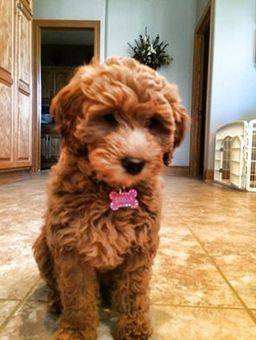
An excellent example of a loose and wavy coat. This dog is an F1 miniature goldendoodle from Ginger and Tamale. Some of Ginger's puppies do throw the sport coat. It can be difficult to predict how the coats will turn out as adults, but we do our best to look for wavy features in the early stages.
In the end, unless you have allergies, please understand they are so much more than just how they look. You get what you get and don't throw a fit! I do my best to help you pick out what you desire, but please note, I do not guarantee coat quality. Puppies are not an item I can stock on the shelf. Mother nature is in control. Many F1s will develop their wave after they go through their coat change at 5 months of age. It can take even up to 8 months to see the true coat quality.
Grooming Tips
Grooming will be an important part of taking good care of your new pet whether you choose to groom your puppy yourself or take him/her to a professional groomer. There are some things you can do to prepare your young pup for success.
When you're playing with your pup be sure to touch them in places commonly missed, which are the tail, muzzle, paws and even the nails.
Training and socializing is important not only for your home but also will help him/her know how to respond with your vet and groomer.
Teach your puppy to accept grooming tools like brushes, combs and even clippers. You can use an inexpensive vibrating tooth brush to help them get desensitized to the sound and vibration of a clippers.
Above all, keep your grooming and brushing sessions short, fun, and positive.
Grooming basics:
1.) Before the bath, get all your supplies ready and laid out. (shampoo, conditioners,dematters, scissors, blow dryers, towel, cup and treats). Comb and brush through your dog as much as possible to get the majority of the matts out AFTER the bath. Bathing first, will get a lot of the dirt and grime out of the matt, causing it to break up some and loosen. Make sure to brush behind the ears, as matts tend to hide there. There are great tools available: strippers, fulminators, undercoat rakes, slicker brushes. Build your supply over time.
2.) If it is your puppy's first time, read his/her body language and at any sign of anxiety, offer a treat and a calm voice and REASSURE your puppy that it is going to be OK! Keep the entire process happy, happy, happy! Stop when your dog has had enough, even if you haven't finished all four paws. Get the other two paws the next time.
3.) For a small puppy, a sink works perfectly. Start with nice warm water and quality shampoo. I recommend shampooing twice. Start at the top of the head and the under side of the muzzle. Especially if you are using a flea and tick shampoo. Starting on the back will cause any fleas to scurry to the top of the head. Be careful not to get soap around the eyes or water on the nose. Soap in the eyes can cause ulcers. To avoid this, buy a tearless shampoo. Remember to lift the muzzle up towards the ceiling as you pour and rinse the shampoo in a downward fashion. Cover the ear with your hand to ensure the water doesn't get in. Extra moisture in the ear is never good.
4.) Work your way down to the 4 armpits and get in those crevices on the underside. Scrub paws well, on top, underneath and between toes. Work your way back to the hindquarters and lift the tail and comb through any fecal matts, apply more soap or conditioner, and clean the genital area as well. Scrub up the tail and down the back legs. Rinse with faucet or a large cup, repeat with conditioner. Thoroughly rinse out so as not to leave any soap that could irritate the skin and cause unnecessary scratching.
5.) Your towel should already be laid out and you should set puppy on the towel and wrap it up. Soak up as much water as you can with the towel. Let the puppy stand on the wet towel as you blow dry, it helps keep the puppy from slipping around. I have also laid a washcloth in the bottom of the sink to help the puppy keep its footing as I shampoo.
5.) Comb through all matts, and work them out with a dematter tool. Be sensitive to delicate skin near the pits. Being too rough can damage the fur/hair on some breeds. Applying a heat dryer will also help to straighten fur and detangle by brushing as you dry. There are wonderful youtube videos that demonstrate this.
6.) Blow dry and brush. Combing from the tips of the fur, down next to the skin, then straight out and up. Back brushing can also make your puppy a little fluffier. Be sensitive to not blow dry too long in one spot. Puppies often don't like blow drying around the ears and face. This is normal. It helps to hold the blow dryer from behind them where they can't see it. Let your puppy snuggle into you if it is a little fearful. Stop, reassure the puppy, offer a treat and keep going, if you can, until completely dry.
7.) Be sure to keep any combs and scissors away from the eyes . Safety first, always protect puppy over project!
8.) Shave if you need to and I recommend watching as many videos on youtube regarding your particular breed.
9.) If your puppy's patience hasn't run out, slowly pluck any hairs out of the ears. Clip toenails, being extra careful not to cut the quick. If you haven't trimmed nails before have a professional show you how. In winter, cut hair carefully in between the paw pads on the bottom of the paws. Extra hair can matt, collect ice chunks and dirt and really hurt your dog feeling like a "pebble in a shoe." If paw pads are left untreated, the dog can start to limp and bleed from neglect.
10.) Always consult a professional or watch videos to learn the most proper grooming needs for your breed if you choose to attempt grooming on your own. These steps are very, very basic. There is a wealth of information available on the web. Learn all you can and your dog will be much happier. It will look forward to this bonding time with you. Your pup will also get better and better at standing during this process if you start young and do it regularly. For a small fee you can subscribe to www.learn2groomdogs.com